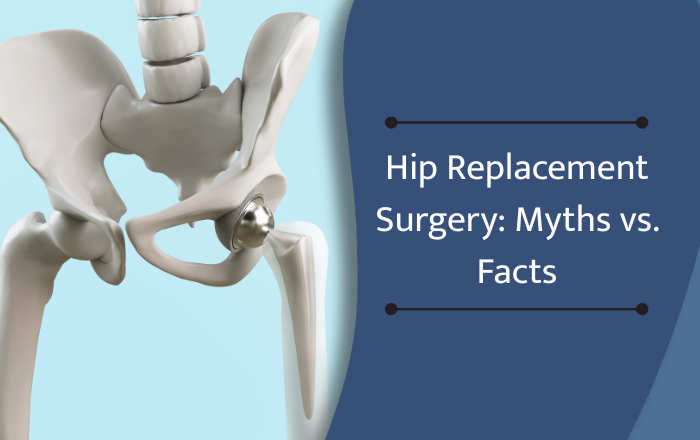
What Precautions Should You Take After Hip Replacement Surgery?
So, you’ve had your hip replacement surgery congratulations on taking this big step toward a pain-free life! But here’s something your doctor probably told you: the surgery itself is just the beginning. What you do after you leave the hospital matters just as much as the procedure itself. Many patients feel uncertain, even nervous, about going home. What can I do? What should I avoid? Am I healing the right way? These are completely normal questions and this guide answers all of them in plain, simple language. Let’s walk through everything you need to know about hip replacement surgery precautions so you can heal safely and get back to your everyday life. The “Do Not” Rules After Hip Replacement Surgery The first few weeks after hip replacement surgery come with a strict set of positioning rules. These exist because your new joint can dislocate if moved the wrong way before the surrounding muscles and tissues have healed. The three rules you must follow: 1. Never bend your hip past 90 degrees This means no leaning forward to pick things off the floor, no low chairs or sofas, and no pulling on your socks without a long-handled tool. 2. Do not cross your legs or ankles Not while sitting, not while lying in bed, not ever at least for the first 6–8 weeks. Keep a pillow between your legs when sleeping. 3. Do not twist or rotate your leg inward Always keep your toes pointed forward. Pivoting on your operated leg is one of the fastest ways to cause a dislocation. Setting Up Your Home Before You Return Your home setup can make or break your hip replacement recovery. Before you arrive home, make these simple changes: Bathroom: Install grab bars near the toilet and in the shower. Use a raised toilet seat at least 17 inches high. Place a shower chair so you don’t have to stand for long periods. Bedroom: Raise your bed height so your hips sit higher than your knees when you sit on the edge. Keep everyday items within easy reach so you never have to bend down. Living areas: Remove loose rugs, cables, or any clutter that could cause a fall. Widen pathways between furniture. If possible, move your sleeping area to the ground floor for the first few weeks to avoid stairs. Medicines — Take Them Seriously After hip replacement surgery, you’ll be prescribed two main types of medicines: Blood thinners: These prevent dangerous blood clots (called DVT — deep vein thrombosis) from forming in your legs. Take them exactly as prescribed, even if you feel perfectly fine. Skipping doses is risky. Pain medicines: Take them on schedule — don’t wait until the pain becomes unbearable. As healing progresses, your doctor will gradually reduce the strength of your pain medication. Avoid: Alcohol, ibuprofen (unless your doctor approves), and skipping any prescribed dose. Physiotherapy — The Most Important Part of Your Recovery If there’s one thing that separates patients who recover well from those who struggle, it’s physiotherapy after hip replacement surgery. Skipping your exercises even on days you don’t feel like it slows everything down. A general recovery timeline looks like this: Week 1–2: Ankle pumps, gentle leg lifts, short walks with a walker Week 3–6: Longer walks, gentle strengthening exercises, supervised stair practice Week 6–12: Balance training, daily activities without assistance 3–6 months: Return to most normal activities Do your exercises every single day. Consistency is what gets you back on your feet. Wound Care — Keep It Clean and Watch It Closely Your incision site needs careful attention during recovery after hip replacement surgery. Keep the wound dry no baths, swimming pools, or soaking for at least 6–8 weeks Shower with a waterproof covering over the area Pat it dry gently after washing never rub Call your doctor straight away if you notice: Redness, warmth, or swelling that’s getting worse Any fluid leaking from the wound Fever above 38°C The wound edges opening up What to Eat During Your Hip Replacement Recovery Your body is doing serious repair work, so feed it well. Protein (eggs, chicken, lentils, paneer) — rebuilds damaged tissue Calcium and Vitamin D (dairy, ragi, sunlight) — strengthens the bone around your new implant Iron (spinach, rajma) — helps replace blood lost during surgery Water — at least 8–10 glasses a day to help medicines work and reduce clot risk Also, pain medicines often cause constipation. Eat fibre-rich foods and ask your doctor about a stool softener if needed. Straining puts unexpected stress on your hip. Warning Signs You Should Never Ignore Go to the hospital immediately if you experience: A sudden “pop” sound followed by severe hip pain One leg looks shorter or is turned outward — this could mean dislocation Chest pain or trouble breathing — could be a blood clot in the lungs Calf pain, redness, or swelling — early sign of DVT Fever and a wound that won’t heal FAQ Q1: How long do hip replacement precautions last? Most positioning precautions last 6–8 weeks. Your surgeon will tell you exactly when it’s safe to stop following them. Q2: When can I drive after hip replacement surgery? Usually after 6–8 weeks, once you’re off strong pain medicine and have full leg control. Always get your surgeon’s approval first. Q3: Can I climb stairs after hip replacement surgery? Yes — most patients begin stair practice around 2–3 weeks post-surgery with a physiotherapist’s guidance. Q4: How long does full recovery take? Basic mobility returns within 6 weeks. Most people feel fully back to normal between 3 to 6 months after hip replacement surgery. Consult Dr. Parimal Kore for Your Hip Replacement Surgery in Pune If you’re in Pune and looking for trusted guidance on hip replacement surgery, Dr. Parimal Kore is a highly experienced orthopedic surgeon withover 15+ years of experience in joint replacement procedures. He practices at Racemous Polyclinics, Magarpatta, Hadapsar, Pune. Whether you’re planning your surgery or already recovering and have concerns don’t guess. Get